Writing Madcow Tests
Your very first test
Open your favourite text editor and add the following:
invokeUrl = http://www.google.com.au/
google_searchBox.value = madcow test automation
google_searchButton.clickLink
waitSeconds = 1
verifyText = <em>Test automation</em> for the rest of us.
then save the file into the Madcow 2.0 tests folder as GoogleTest.grass.
Now create a new file with the following:
#Google Search
searchBox.name=q
searchButton.name=btnG
and save the file into the Madcow 2.0 mappings folder as google.grass.
Then open up a command prompt or terminal window on Mac and type…
./runMadcow.sh -t GoogleTestYou should see a lot of things start to happen. Don’t worry this is just your test running.
It is running the above GoogleTest.grass file, which will basically do the following steps:
- open a web browser to www.google.com.au
- type the value “madcow test automation” into the search box with the html name of “q”
- click the search button/link with the html name of “btnG”
- wait for 1 second while the page reloads
- check that the resulting page has certain text on it
Note: Each one of those steps listed here directly correlates to the step in the testcase.
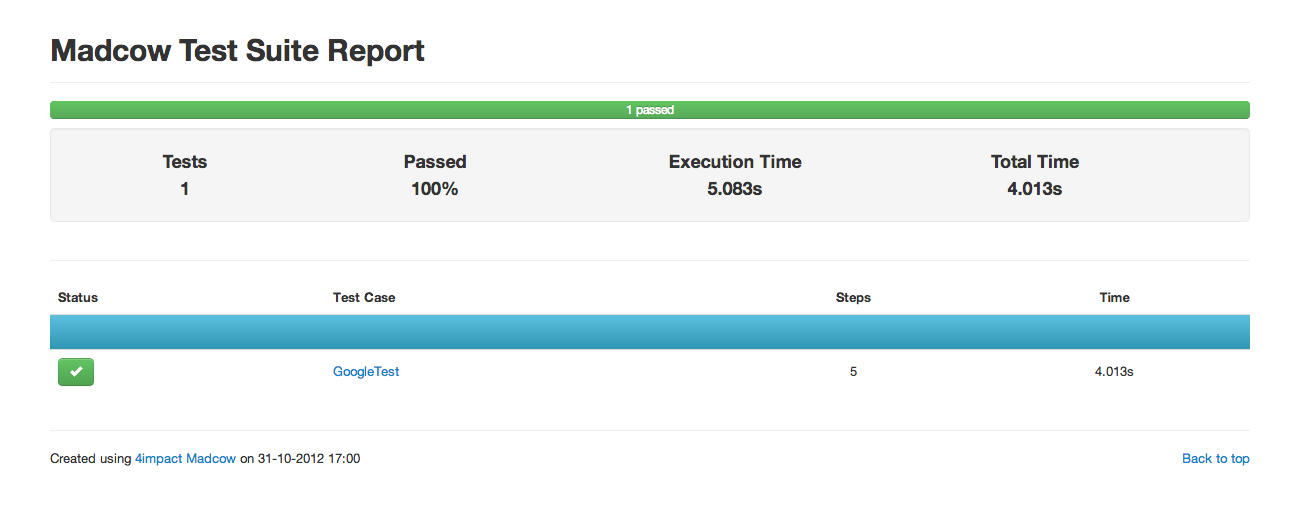
Once completed you will then want to see the results of your test. To do this simply open the index.html file in the results\madcow-results folder in your browser of choice.
or run at the command line in Mac
open results\madcow-results\index.html or in Windows
results\madcow-results\index.html It should look similar to this:

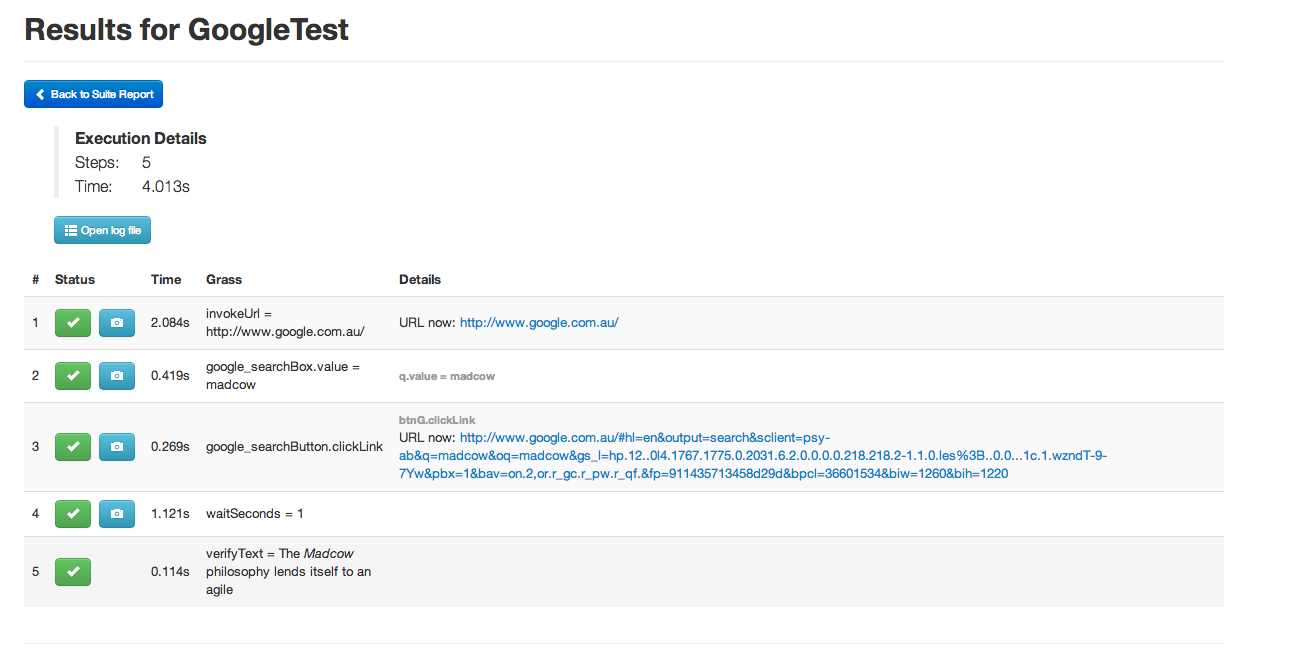
Here you can see that it all passed successfully. To see further details about the test run click on the “GoogleTest” link and you should see more details step-by-step results showing what the Madcow test did.

That’s great, but how did that all work?
The main principle behind Madcow is to easily specify an element in your web application and manipulate it and make assertions on it. To specify an element simply refer to its html ID on the page. For instance the html:
<input type="text" id="searchBox" value="" />can be found and used in your test by:
searchBox.value = "Find me the cheapest phone"This will find the element with id searchBox, which is an input element and then set its value to "Find me the cheapest phone".
But what if the element you are trying to test doesn’t have an ID? Madcow has a simple mapping mechanism that map xpaths, names or text to nice IDs you can use in your tests.
So what was that google.grass file for then?
Map the elements to nice names
By default Madcow 2.0 will use the IDs in your html to find elements. But often these are ugly or non-existent. The google front page is a good example of this. So we will need to map the search box and search button to nice names to use them.
Madcow looks for files in your mappings directory named *.grass.
This is why in the original example we created a new file call google.grass with the following lines:
#Google Search
searchBox.name=q
searchButton.name=btnG
about4impactLink.xpath=//h3[@class='r']/a[@class='l' and text()='About 4impact']
The Google front page has an input box with no ID but has a name attribute of the value “q”, like this:
<input class="lst" value="" title="Google Search" size="55" name="q" maxlength="2048" autocomplete="off"/>In our mappings file we mapped it to the label searchBox by writing:
searchBox.name=qWe do the same thing for the searchButton. This then allows us to reuse these “mappings” in your test cases by following the mappings convention of filename_item, or in our example
google_searchBox.value = Madcow test automationSo what’s that Invoke URL stuff?
To tell madcow to open up a browser and navigate to your web app in your test simply run the invoke step
invokeUrl = http://www.google.com.au/Manipulate elements on the page
Now we want to do a search for the About 4impact page.
google_searchBox.value = 4impact
google_searchButton.clickLink
The .value command sets the value of the input box to be 4impact. And the .clickLink command clicked on the search button, which in this case, submitted the google search and displayed a new page with the search result. These items after the . are known as Madcow operations.
Finally we want to click on the About 4impact link. We know that the link will be in the search results page with so in our google.grass file we can map an xpath expression to the About 4impact google search result.
about4impactLink.xpath=//h3[@class='r']/a[@class='l' and text()='About 4impact']So let’s click that link
google_about4impactLink.clickLinkAnd that’s it for your new “About 4impact” google search test! Here is the full listing.
invokeUrl = http://www.google.com.au/
google_searchBox.value = 4impact
google_searchButton.clickLink
waitSeconds = 2
google_about4impactLink.clickLink
Writing in Grass files
The simplest form of tests in Madcow 2.0 is in a GRASS file. Simply create a test ending with MadcowTest.grass such as GoogleMadcowTest.grass in the test directory and Madcow will automatically find and run it. These grass files are the same as properties files used in Madcow version 1.
You can only have one test in a single grass file.
Importing other grass files
A powerful feature of Madcow is the ability to load other properties files in your tests to get greater reuse. To do this you use the import command.
import = LoginActions
searchClaimBox.value = 123323
searchButton.clickLink
policyNumber.checkValue = 3344
import = LogoutActions
The import command will look for properties files, in this case LoginActions.grass and LogoutActions.grass and insert the contents of these files into the script. See Templates for more information.
Using Data Binding Parameters
Madcow allows the use of data parameters, to specify reusable pieces of test data throughout a test. This allows a test to be data driven rather than being bound to a specific set of data throughout the test. The data parameters are used through the @ notation. See Data Parameters for more information.
Adding comments to your tests
To add single line comment to a test simply prepend a # to the front of the line.
# this is a useful test